May 8, 2020

Testing Vendor Payment Advices (easy & quick)

A few weeks ago, I posted a way to test the creation of Electronic Payment files for Vendor Payments in a way that you do not need to regenerate the whole Payment Run over and over every time you need to re-test.

Today I will show you a way to retest the creation of Vendor Payment Advices in a similar way to my previous post.

In this case, this technique is really useful whenever you are developing your Vendor Payment Advice Form and you have your Abap developer asking you for the steps to generate the form. In this case, it will be hard for him to generate data for Vendor Invoices, do a Payment Proposal, pay it and trigger the Advice from it. That without mentioning that the Business Partner - Vendor needs to be properly setup and that he does not get any errors while generating the Payment Proposal (which it is quite common). That is to much for an Abaper !!! Not that they cannot do it, but imagine that this is not the only area / module that they work on. They cannot know how to do everything in the system. Even some Finance consultants that are not that experienced have issues doing this ...

Now, considering that you have a previously created and completed Payment Run for which the system should have triggered a Payment Advice Form, you will follow my steps and be able to continuously use the same one over & over.

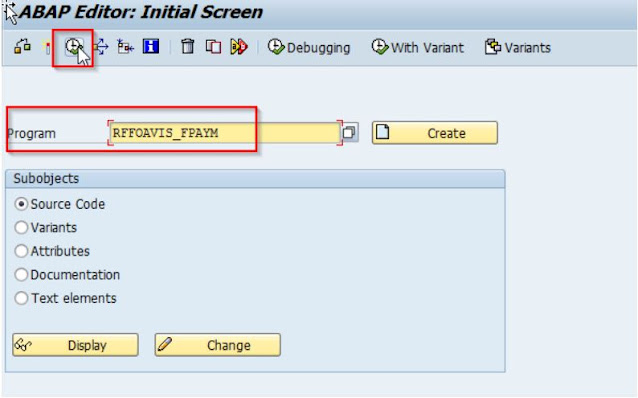
Go to SE38 and execute program RFFOAVIS_FPAYM


Now that we have entered into the Payment Advice Program, you will enter the "Program run date" and the "Identification feature" (Ex. 20200305 and AD001) of your previously executed Payment Run that already triggered a Payment Advice.

This will trigger the creation of the Payment Advice again and you or your Abap developer will be able to see the changes that he did in the Form. 
The Payment Advice will be generated and sent to your Spool or via email depending if you have in place the necessary development to trigger it via email. (not part of this explanation).

If he needs to do more changes, he will just go back to the Form, adjust it and then re-execute this procedure. 
With this, you or him does not need to re-generate a whole set of new data and transactions every time he needs to do some testing or adjustments.

** Note: The Paying Company Code and the payment method are not needed, you can leave it blank if you need. They were part of a previous capture that I had.


If your Company and/or Project needs to implement this, or any of the functionalities described in my Blog, or advise about them, do not hesitate to reach out to me and I will be happy to provide you my services.

Apr 10, 2020

Testing and recreation of the Electronic payments file for the Bank

When building and testing the creation of Electronic Payment files for the Bank, you will need to go through multiple iterations in order to get it built and tested. To do that, you will normally have to run multiple Payment Runs that will create your Electronic Payment file. You will create a Payment Run, then run it complete to get a Bank file created. Then you will adjust your config again. At this point you will have to either reverse the payment and pay again the same Vendor/Invoice or select / create new testing Data. During the build process of an Electronic file, this will happen multiple times over the course of your project.

In order to avoid paying and canceling the payment or entering new data over & over, I will show you a couple of tricks and 2 different ways to achieve this.

  • 1 - Run your F110 Proposal with the "Create Payment Medium" flag activated.


F110 - Proposal Schedule

When you activate the flag, after running the Proposal; the system will create the Electronic file and then it will be available for you to download and check it. Then you will go back to adjust your config, delete the Proposal and re-run it again with the same data / options. 
This way you can re-use over and over the same data without the need for any payment reversal or entering new data.
When you will go to download the file, you will see that more than one file was created for your Payment Run, as it does not delete the old one, you need to select the one with the higher sequence number.

** Note: "Start Immediately" should also be activated.

  • 2 - Recreate the Electronic Payment file for an already executed Payment Run.


There is another way to do it for a Payment Run that has already been executed all the way to Payments executed / posted. This is also an excellent trick to be used in Production when for any reason your payment file needs to be recreated and resent to your bank.

When a Payment Run has been fully completed, a normal user will not be able to recreate a file by himself. He will have to reach for support and if you do not know how to do it, your 1st reaction will be to cancel (reverse) all the clearing documents paid to Vendors and recreate a new payment run. This sounds easy, but companies normally pay tens or hundreds of Vendors in a Payment Run. So doing this will cost you a lot of time an effort to do it 1 by 1.

Instead, you need a way to "just recreate the file" ...

You will go and run Program RFPAYM_RESET with SE38 / SA38

SE38 / SA38 Program execution

Program RFPAYM_RESET


You will specify your Payment Run Data and Identification and Execute it. This will unmark your Payment Run as if a file creation was never done, allowing you to create a new file again. 

But how do you trigger the creation of a new file again ? Easy ....

You will go an Execute program SAPFPAYM with SE38 / SA38


You will specify your Payment Run Data, Identification, Payment Medium Format and Execute it (same data as you entered when you did the Reset). This will recreate your Electronic File again for the same Payment run and then you will be able to download it.
When you will go to download the file, you will see that more than one file was created for your Payment Run, as it does not delete the old one, you need to select the one with the higher sequence number.

You can repeat the Reset and Create as many times as you want.

If your Company and/or Project needs to implement this or any of the functionalities described in my Blog, do not hesitate to reach out to me and I will be happy to provide you my services.

www.dnabusinessconsulting.com

Mar 22, 2020

How to add SD Partner Functions as Characteristics in COPA for Profitability reporting

There are at least 3 different ways to add SD Partner Functions in COPA that I know.


  1. This one is complex and it requires Abap code and enhancements in standard SAP programs. That one is outlined by SAP in OSS Notes (36557, 12682, 32878, 93658). 
  2. Another one is kind of similar to the one that I will recommend, but it does not work in all the cases as the Sales Rep. is not always an SAP employee (PERNR). (This one was described by Paul Ovigele in the SAP Insider blog)
  3. An easy one .... that I have used and developed through the years, that works, it's easy and it requires minimal development (around 15 mins. ). This is the one that I will share with you in this Blog Post ...


To start with we will look at a Sales Order with its Partner Functions
* For confidentialy reason, names and descriptions are masked
Here you can see that we have different Partner Functions in this Sales Order (AG - Sold To, RE Bill To, WE Ship To and a custom one ZE - Sales Representative).

The Sales Representative is a typical Custom Partner Function that SD implementation teams normally create. It is commonly used to calculate commissions, among other things. But from a Profitability Analysis perspective it is also really helpful to be able to calculate how profitable a Sales Rep. is (or his customers). So it is also a common business requirements to have it as a COPA reporting Characteristic.

The SD Partner functions in the Sales Orders can be found in Table VBPA - Sales Document: Partner

As you can see above, in our previous Sales Order, we had ZE - Sales Rep. Partner Function assigned to "Vendor" 35xxx52. We can see the record in the Table VBPA.

Now, if you know a little bit of COPA, you might see where this is going .... With a simple COPA Derivation step, we will read table VBPA (Table lookup) and get the Sales Rep. #.

But .... there is a hick here. How do I create this COPA Characteristic in a way that I will not only have the number, but also the "key description" so I can have the Sales Rep. name in my Profitability reports and not just the number? Otherwise, it will be easy just to get the Sales Rep # into a Custom Characteristic field. But people will need to know what is the name of Sales Rep. 35xxxx52, it is not practical if you have many Reps. like big companies normally have.

This is where we need to do a really small development.

All custom and additional Partner Functions that can be added in COPA, need to be added first in Structure MCPARTUSR (Additional Partners from VBPA).
The right way to do it is by doing an APPEND in this structure right after field PDUMMY. As you can see below, we added 2 fields. The one that we will use is ZSREP_LI


The Field ZSREP_LI is defined with a Check Table and all the right definition same as LFA1-LIFNR as our Sales Rep. has been defined as a Vendor by our SD Team. I have used it before defined as a Customer as a different solution.

This of course cannot be done by a Functional Consultant, it needs to be done by a quilified Abaper.

As you can see below, Structure MCPARTUSR is also an Include of Table PAPARTNER, so the new fields get added to PAPARTNER automatically after saving.


Once this is added to MCPARTUSR, then we can go to create the Custom Characteristc (Tcode KEA5) to be added later to the Operating Concern.


I will create a Characteristic based on Table PAPARTNER that will use my Appended Table MCPARTUSR fields. Ex. WWSRP


Now the added field ZSREP_LI can be used and I will call it WWSRP (In this case the image is slightly difference as this was previously done to taking the screen shoots).

There are other standard partner functions that normally do not come as part of the Operating Concern in COPA and can also be added as Characteristics. Ex. WE - Ship to. You just need to create a Characteristic using KUNWE. Similar process for RE - Bill To. (KUNRE). The difference with the Sales Rep. is that these other are SAP Standard Partner Functions and they all have their own fields and check tables that will give us all the validations and descriptions, not just the code.


Now that the Characteristic has been created, we will add it to the Operating Concern as you would add any other Characteristics.

*** Note: We will not describe this process. We assume that if you are reading this you have the basic COPA knowledge to perform it.

Finally, the Characteristic has been Added to the Operating Concern. But the way it is right now, it will not get filled with any values yet.

We need to build a Characteristic Derivation Step (Tcode KEDR) of the Type Table Lookup for Table VBPA, the one that contains the records that hold the Partner Functions of the Sales Orders.


It is important to take into consideration to have POSNR as '000000' as normally the Partner Functions are at the Header Level. In case your SD design has them at the Line item level, then this will not be a constant. (See Table VBPA displayed previously)
In PARVW you will use GLOBAL-USERTEMP1 and then input RE (SAP Internal denomination for Bill-to) or ZE as per my previous example for Sales Rep.
Then the Target field will be your recently defined COPA Characteristic (Ex, KUNRE, WWSRP, etc.).

This concludes our process to Add a Custom Partner Function in COPA. As you could see it just requires a small Append in a Table that would take a good Abaper, not more than 10/15 minutes. And for sure this is 100% upgrade proof ... !!!


If your Company and/or Project needs to implement this, or any of the functionalities described in my Blog, or advise about them, do not hesitate to reach out to me and I will be happy to provide you my services.